Controller ( Yii Framework )

在mvc的controller,主要是處理邏輯部份,會依照不同的path、參數、method…等,決定要處理的資料,以及要回傳什麼資訊給user。在Yii的controller都繼承至CController,需要導向哪個action,會在controller裡面設定完成。

  1. Route
  2. Action
  3. Filter

Route

在Yii裡的程式進入點,都是透過project/index.php這一隻程式,在根據webApp的confifg,決定預設執行哪支controller,以及在project/protected/controllers對應的path。

例如在project/index.php裡,會指定使用哪個config:

1
2
3
$config=dirname(__FILE__).'/protected/config/main.php';

Yii::createWebApplication($config)->run();

然後在main.php的config中,可以透過defaultController指定預設controller:

1
2
3
4
return Array(
'defaultController'=>'post',
//doSomething
);

意思就是當path為根目錄時,會導向至PostController,例如url為:

1
http://localhost/

與下面url相同,會藉由r這個參數對照contoller/action(當action未指定時,預設執行actionIndex這function,也可透過defaultAction自訂):

1
http://localhost/index.php?r=post/index

對應的project/protected/controllers/PostController

1
2
3
4
5
6
class PostController extends CController {

public function actionIndex(){
//doSomething...
}
}

如果想自訂controller對應class的路徑,可使用controllerMap


自訂url對應controller和action

使用自訂的url規則,去對應controller和action,可以修改webapp的config:

1
2
3
4
5
6
7
8
9
10
11
return array(
'urlManager'=>array(
'urlFormat'=>'path',
'rules'=>array(
'post/<id:\d+>/<title:.*?>'=>'post/view',
'posts/<tag:.*?>'=>'post/index',
'<controller:\w+>/<action:\w+>'=>'<controller>/<action>',
),
),
//doSomething...
);

nginx的config設定,將除了靜態檔案以外的request,全部導向至index.php:

1
2
3
4
5
6
7
8
9
10
11
12
13
14
15
16
17
18
19
20
21
22
23
24
25
26
server {

listen 80 default;
server_name localhost;

access_log /var/log/nginx/localhost.access.log;

location ~* \.(js|png|jpg|gif|css|html)$ {

root /home/user/example/yii_example/yii/demos/blog;
}

location / {

index index.php index.html index.htm;
rewrite ^(.*) /index.php last;
}

location ~ \.php$ {
fastcgi_pass 127.0.0.1:9000;
fastcgi_index index.php;
#fastcgi_param SCRIPT_FILENAME /tmp$fastcgi_script_name;
fastcgi_param SCRIPT_FILENAME /home/user/example/yii_example/yii/demos/blog$fastcgi_script_name;
include fastcgi_params;
}
}

Action

yii根據path導向至不同的controller,在透過controller指派action去處理。一般來說action可以直接寫在controller裡,也可以透過繼承CAction的方式,在controller定義此class。

在controller裡面定義action,有兩種方式:

  • 只需要讓function名稱的開頭為action,在加上action的名稱即可。

    1
    2
    3
    4
    5
    6
    7
    8
    9
    10
    11
    12
    13
    14
    15
    16
    17
    18
    19
    class PostController extends CController {

    /**
    * path為
    /index.php?r=post
    /index.php?r=post/index
    **/
    public function actionIndex(){

    }

    /**
    * path為
    /index.php?r=post/create
    **/
    public function actionCreate(){

    }
    }
  • 透過actions這個function,回傳定義好的config,對應不同CAction

    1
    2
    3
    4
    5
    6
    7
    8
    9
    10
    11
    12
    13
    14
    15
    16
    17
    class PostController extends CController {

    public function actions()
    {
    return array(
    // page action renders "static" pages stored under 'protected/views/site/pages'
    // They can be accessed via: index.php?r=site/page&view=FileName
    'page'=>array(
    'class'=>'CViewAction',
    ),
    // file path under 'protected/controllers/post/SayHelloAction'
    'sayhello'=>array(
    'class'=>'application.controllers.post.SayHelloAction',
    ),
    );
    }
    }

CAction

繼承至CAction的方式,如下:

1
2
3
4
5
6
7
class SayHelloAction extends CAction {

public function run()
{
//doSomething...
}
}

yii也提供一些現成的action可以使用,像是:

  • CCaptchaAction
    自動產生驗證碼,需要安裝php5-gd。

  • CViewAction
    可透過view這個參數,導向到不同頁面,而不需要針對每個頁面寫一個action。

Filter

yii的filter與action在controller的配置方式差不多,同樣可以在controller自訂filter的function,也可以class的方式繼承CFilter

在controller寫filter方式:

1
2
3
4
public function filterAccessControl($filterChain)
{
// call $filterChain->run() to continue filter and action execution
}

如果呼叫$filterChain->run(),將會繼續往下執行下個filter和action,反則會中斷掉。

與action在controller宣告不同的是,filter的套用,必須在controller裡定義filters這個function,回傳定義的config:

1
2
3
4
5
6
public function filters(){

return array(
"accessControl",
);
}

上面這種方式,將會套用此controller的所有action,若要套用個別action,如下:

1
2
3
4
5
6
7
public function filters(){

//將filter套用至edit和create action
return array(
"accessControl + edit, create",
);
}

如果把+替換成-,指的就是除了edit和create這兩個不套用filter,剩下全部套用。

CFilter

CFilter將會透過preFilter這個function,決定要繼續向下執行或者停止,而postFilter則是會在preFilter向下執行時,才會去呼叫。

定義一個filter:

1
2
3
4
5
6
7
8
9
10
11
12
13
14
15
16
17
class PerformanceFilter extends CFilter
{

public $unit;

protected function preFilter($filterChain)
{
// logic being applied before the action is executed
//print $unit;
return true; // false if the action should not be executed
}

protected function postFilter($filterChain)
{
// logic being applied after the action is executed
}
}

在controller中使用PerformanceFilter:

1
2
3
4
5
6
7
8
9
10
11
12
13
class PostController extends CController
{
......
public function filters()
{
return array(
array(
'application.filters.PerformanceFilter - edit, create',
'unit'=>'second',
),
);
}
}

filter第二個傳入參數unit,將會設定PerformanceFilter的unit值。所以除了第一個參數,會設定filter,之後的參數都會對應filter的public屬性。
Getting Started with the Yii Framework

REQUIREMENTS

實際需要使用到的:

文章中需要使用到:

INSTALL

在終端機上執行以下command:

1
2
sudo apt-get update
sudo apt-get install php5-cgi php5-fpm php5-sqlite php5-mysql nginx git

QUICK START

抓取yii的source:

1
git clone https://github.com/yiisoft/yii.git

建立一個webapp:

1
2
mkdir webapp
./yii/framework/yiic webapp webapp/

建立完後的目錄結構:

1
2
3
4
5
6
7
8
9
10
11
12
13
14
15
16
17
18
19
20
21
22
23
24
25
26
27
28
29
30
31
.
├── assets
├── css
│   ├── bg.gif
│   ├── form.css
│   ├── ie.css
│   ├── main.css
│   ├── print.css
│   └── screen.css
├── images
├── index.php
├── index-test.php
├── protected
│   ├── commands
│   ├── components
│   ├── config
│   ├── controllers
│   ├── data
│   ├── extensions
│   ├── messages
│   ├── migrations
│   ├── models
│   ├── runtime
│   ├── tests
│   ├── vendor
│   ├── views
│   ├── yiic
│   ├── yiic.bat
│   └── yiic.php
└── themes
└── classic

其中assets、runtime和data,必須要讓www-data(nginx、apache)有讀、寫和執行的功能,可使用設定群組的方式,或者執行chmod -R 777 assets protected/runtime protected/data

打開nginx config:

1
sudo vi /etc/nginx/sites-enabled/default

修改以下這兩個location,設定你的webapp位置和設定fastcgi連接到php-fpm:

1
2
3
4
5
6
7
8
9
10
11
12
location / { 
root /tmp/webapp;
index index.html index.htm index.php;
}

location ~ \.php$ {
#fastcgi_pass 127.0.0.1:9000;
fastcgi_pass unix:/var/run/php5-fpm.sock;
fastcgi_index index.php;
fastcgi_param SCRIPT_FILENAME /tmp/webapp$fastcgi_script_name;
include /etc/nginx/fastcgi_params;
}

如果使用的是nginx和php-fpm,請檢查php-fpm的listen設定,對應上面的fastcgi_pass。檔案位置在/etc/php5/fpm/pool.d/www.conf

設定完之後,重開nginx:

1
2
3
4
sudo /etc/init.d/nginx restart

#若是php-fpm的config的有被修改到,需重啟fpm
sudo /etc/init.d/php5-fpm restart

在瀏覽上打開http://localhost/,就可以看到剛剛佈署完的結果了。

在Titanium HTTPClient使用cookie與header

titanium內建的HTTPClient本身就有實作cookie的功能,使用起來跟瀏覽器一樣,會自動解析response header,及發送以設定的cookie,而不需要額外去解析header,和添加request的header,要清除cookie可以使用clearCookies,若要在client端設定cookie,可以使用setRequestHeader

清除與設定cookie

建立一個HTTPClient:

1
var client = Ti.Network.createHTTPClient({});

指定清除某個網域底下的cookie:

1
client.clearCookies( "www.example.com" );

由client設定cookie:

1
client.setRequestHeader( "cookie", "name=sparrow;" );

使用cookie常見問題

通常cookie能不能被存取,會依照expires、path、domain、HttpOnly、secure這幾項辨識:

  • expires : cookie的時效性,當時間超過expires設定的日期,這個cookie將會被捨棄。

    1
    expires=Sat, 17-Oct-2015 14:11:09 GMT;
  • path : 在domain下,cookie允許存取的路徑。

    1
    path=/;
  • domain : cookie允許存取的domain。

    1
    2
    3
    4
    domain=.google.com.tw;
    最前面的.指得是子網域皆可存取,例如:
    www.google.com.tw
    ad.google.com.tw
  • HttpOnly : 在瀏覽器下看到這個屬性時,只允許server端操作此cookie,換句話說client雖然存此cookie,卻無權操作,可防止透過xss將cookie偷走。

    1
    HttpOnly
  • secure :只允許在https上操作此cookie,在一般http接無法存取。

    1
    secure;

如果有用到nginx、apache這類的server去做proxy,需要檢查path或domain,才不會遇到cookie無效的狀況。

解析response的header

在android的device,如果想要取得header的內容可以使用allResponseHeaders,雖然titanium有提供getResponseHeader的功能,實際使用過都無法取得到值。

在onload取值:

1
2
3
4
client.onload = function(){

Ti.API.info( client.allResponseHeaders );
};

如果你想取得一個header的json,可以實作一個類似這種function:

1
2
3
4
5
6
7
8
9
10
11
12
13
14
15
16
17
18
19
20
21
22
23
24
25
26
27
28
29
30
31
32
33
34
35
36
37
38
39
40
41

/**
* @param {*} ary
* @type boolean
*/
var isArray = function( ary ){

return Object.prototype.toString.call( ary ) === "[object Array]";
};

/**
* @param {String} allResHeaders
* @type Object
*/
var getHeaders = function( allResHeaders ){

var result = {},

headerStrs = allResHeaders.split( "\n" );

for ( var index in headerStrs ) {

if ( headerStrs[index] ) {

var header = result[index].split( ":", 2 ),

name = header[0].toLowerCase(),

value = header[1];

if ( result[name] && !isArray( result[name] ) ) result[name] = [ result[name], value];

else if ( isArray( result[name] ) ) result[name].push( value );

else result[name] = value;

}
}

return result;
};

透過getHeaders取值:

1
2
var headers = getHeaders( client.allResponseHeaders );
Ti.API.info( headers );

Angularjs directive uses transclude attribute

使用directive時,會將符合restrict的element都做初始化,directive指向的element包含child-element,這時候就要設定transclude:true,將child-element,添加到template裡,可以使用ng-transclude或者透過directive定義controller去處理。

透過ng-transclude處裡child element

定義好tag的結構,button-group為預設tag:

1
2
3
4
5
<div>
<button-group>
<button>Enter</button>
</button-group>
</div>

透過ng-transclude,將原先在button-group裡的child-element添加至ng-transclude裡面:

1
2
3
4
5
6
7
8
9
10
11
app.directive( "buttonGroup", function(){

return {

restrict: 'EA',
template: '<div class="btn-group" ng-transclude ></div>',
replace: true,
transclude: true
};

});

最後就會取得到底下的結果:

1
2
3
4
5
<div>
<div class="btn-group" ng-transclude="">
<button class="ng-scope">Enter</button>
</div>
</div>

透過directive的controller添加child element

使用$transclude取得clone的element,在append至需要添加的地方:

1
2
3
4
5
6
7
8
9
10
11
12
13
14
15
16
controller: ['$scope', '$element', '$transclude', function ($scope, $element, $transclude) {

$transclude(function(clone) {

var primaryBlock = $element.find('div.primary-block');
var transcludedButtons = clone.filter(':button');

angular.forEach(transcludedButtons, function(e) {

if (angular.element(e).hasClass('primary')) {
primaryBlock.append(e);
}

});
});
}]

使用ngTransclude的Demo

完整的範例,請參考jsfiddle上的code。

Angularjs directive uses attributes of scope

在angularjs中的directive的scope,分別有以下3種設定方式:

  • = or =attr : 指定需要連結的model名稱,會與parent scope的model互相綁定。
  • @ or @attr : 依照屬性的value傳入,來設定directive的scope值。
  • & or &attr : 將預設的function,委託給其他event呼叫。

只要directive有設定scope對應的值,或者設定scope:true,則directive將會自行建立一個新的scope。

使用 & 和 @ 屬性來設定scope

定義一個alert屬性:

1
<div alert on-enter="$window.alert('Hello world')" message="Say hello world!"></div>

其中message屬性為alert呈現的訊息,on-enter則會在按鈕被點擊即時會觸發。

實作一個alert directive:

1
2
3
4
5
6
7
8
9
10
11
12
13
14
15
app.directive( "alert", function(){

return {

restrict: "A",
template: "<div class='alert-container'><p ng-bind="message"></p><button ng-click='onEnter();'>Enter</botton></div>",
scope:{
"onEnter":"&",
"message":"@"
},
replace: true

};

});

alert的scope將會取得onEntermessage的屬性,分別去對照template的ng-click="onEnter()"ng-bind="message"

Demo

完整的範例,請參考jsfiddle上的code。

在angularjs限制同時間的request的數量

假設有多筆request要發送時,但又不希望一次全發送出去,希望將request的數量,在同個時段只出現5個request,這時候就需要一個manager之類的object去處理,在這裡使用ngHttpPool為例。

安裝ngHttpPool

使用bower安裝,或者至github下載:

1
bower install ngHttpPool

使用ngHttpPool

載入一個ngHttpPool module:

1
<script type="text/javascript" src="/bower_components/ngHttpPool/public/src/ngHttpPool.js"></script>

定義module相依性:

1
2
3
4
5
angular.module( "app", [ 
"ngHttpPool"
]).controller('ctrl',function( httpPool ){
//doSomething
});

建立一個pool和定義同時存在的最大request數量:

1
2

var pool = httpPool.create( 2 );

傳入config,發送多個request:

1
2
3
4
5
6
7
8
9
10
11
12
13
14
15

for( var index = 0; index<10 ; index++ ){

/**
* @param {Object} config
* @param {function} success is optional
* @param {function} error is optional
*/
pool.map({method:"get",url:"/",params:{id:index}}, function(){

console.log( "success" );

});

}

如果要等request都從server返回,可使用以下的方式:

建立一個defer,會將之後發送request都當作監聽對象:

1
2

pool.listen()

將config push到pool,執行request的發送:

1
2
3
4
5

for( var index = 0; index<10 ; index++ ){

pool.map({method:"get",url:"/",params:{id:index}});
}

結束監聽,當所有結果回傳時,將會執行promise.then:

1
2
3
4
5
6

var promise = pool.Promise();

promise.then(function(){
console.log( "all of the callbacks." );
});

Demo

可參考ngHttpPool github。

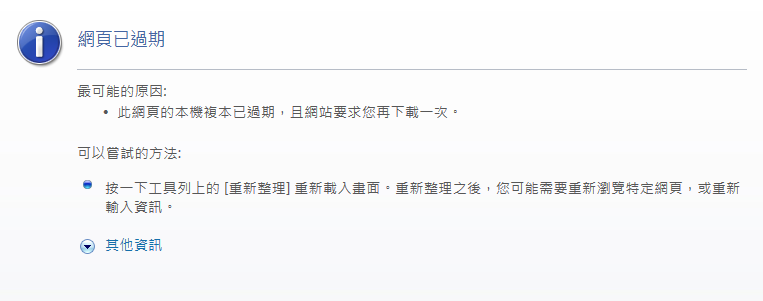
網頁已過期在IE7、IE8

網頁已過期在IE7、IE8

通常這個問題是當form submit出去後,再按上一頁、下一頁就會出現的問題,不過如果在form的action設為錨點,也可能引起這種狀況,而這種情況則是未升級到IE9會發生的。

實際狀況

第一種狀況
form submit出去,由使者點選上一頁、下一頁就會出現這種狀況,或者是透過程式控制history

1
2
history.go()
history.back()

第二種狀況
form的action為’#’時,會導致form送出之後,在被重新導向

1
2
3
<form method="post" action="#">

</form>

而第二種狀況比較特別,只在未升級的成IE9以上瀏覽器,用相容模式在IE8包括以下的瀏覽器,才會出現這種問題。至於目前使用的chromefirefoxIE9+都已經不會有這問題了。但第一種狀況IE還是會出現,其餘瀏覽器都會重新submit和保留之前的畫面。

angularjs-placeholder submit a form on IE

使用angularjs-placeholder可以在老舊IE上,支援placeholder這個屬性,但是底層還是去實作foucsblur這兩個event,並且用替換value的方式,達到模擬placeholder的效果。在一般使用上沒什麼太大問題,但是假設今天有一個formsubmit的時候,會把placeholder的預設值也一起送出,這時就必須在submit之前,就將預設值清除,或者在取值得時候,暫時將欄位值清除,之後在還原。

使用placeholder.ensure取值:

ensure接受兩個參數:

1
2
3
4
5
6
7

/**
* @param {jQlite} $elem 可以是form或者為多個elements
* @param {function} callback 實際取值的地方
*/


placeholder.ensure( $elem, callback );

callback裡面取得值後,可使用record.back來回復placeholder的預設值。

1
2
3
4
5
6
7
8
9
10
11
12
app.controller( "formController", [ "placeholder", "$element", function( placeholder, $form ){

placeholder.ensure( $form , function( record ){

var $textarea = $form.find("textarea");
alert( $textarea );

//復原
record.back();
});

});

若要直接submit可直接呼叫ensure,不須使用callback。

1
placeholder.ensure( $form )

如果使用有支援placeholder的瀏覽器,還是會有ensure可以使用,但是將不會改變任何屬性,純粹只是個包裝過後的function。