weinre是一個用於瀏覽器的遠端除錯工具,運作方式與jsconsole相同,都是透過include一隻外部js script,來與server溝通傳遞資料。但是jsconsole只提供一些很基本功能,如果要能像chrome一樣,查看dom element、network等功能,可以使用weinre。
使用時機:
使用android、ios等手持裝置的browser,或者對IE除錯的時候,都很適合。
weinre原理:
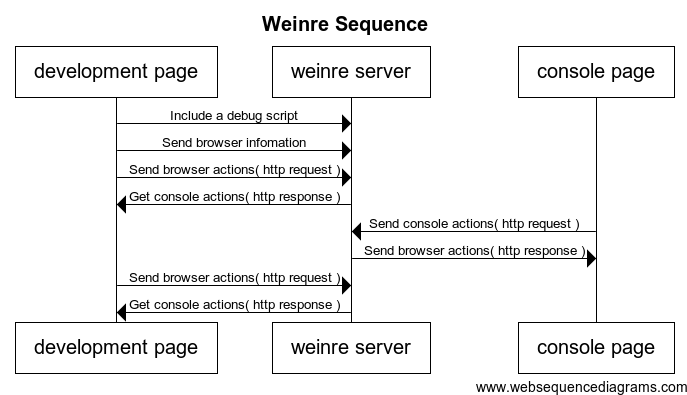
weinre基本原理是,建立一個console page,然後經由weinre server,與development page(你要除錯的page)互相傳遞資料溝通。( 溝通方式採用long polling)
時序圖如下:
透過node.js安裝:
sudo npm install -g weinre
操作流程:
開啟weinre server:
weinre --httpPort 8081 --boundHost localhost
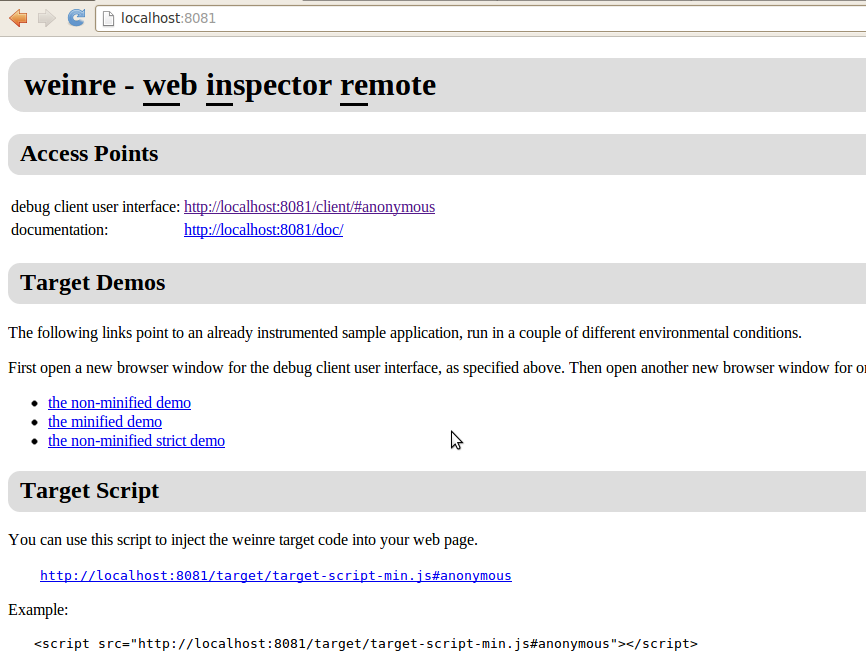
打開瀏覽器輸入http://localhost:8081/:
然後在你想要除錯的頁面加上以下script:
<script src="http://localhost:8081/target/target-script-min.js#anonymous"></script>
例如:
<!DOCTYPE HTML>
<html lang="en">
<head>
<meta charset="UTF-8">
<title></title>
<script src="http://localhost:8081/target/target-script-min.js#anonymous"></script>
</head>
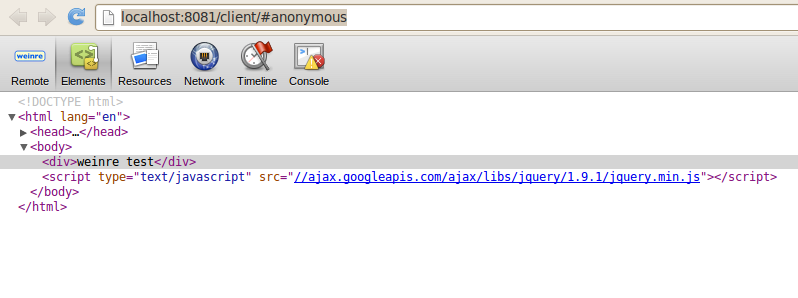
<body>
<div>weinre test</div>
<script type="text/javascript" src="//ajax.googleapis.com/ajax/libs/jquery/1.9.1/jquery.min.js"></script>
</body>
</html>
開啟http://localhost:8081/client/#anonymous,就可以開始除錯了。