Titanium Android native module

titanium本身有提供建立native module的指令,可透過指令產出基本可以使用的template,然後再做修改。

可參考官方的quick start,或者直接參考以下教學:

建立一個android native module

建立一個android module
1
ti create -p android -t module -d . -n test -u http:// --id com.example.test
build一個native java project
1
2
cd test/android
ant
將build好的zip,解壓縮至titanium的module路徑
1
unzip -o com.example.test-android-1.0.0.zip -d ~/Library/Application\ Support/Titanium/

KrollModule與KrollProxy

透過titanium的指令產生的native module,會建立出Module和Proxy兩個class,分別繼承KrollModuleTiViewProxy。其中會看到Kroll.methodKroll.getPropertyKroll.setProperty這些annotation,主要是會將method或者參數讓js去使用或存取寫入用。

取得剛建立好的native module
1
var test = require('com.example.test');
若是在KrollModule宣告的Kroll.method這類annotation,將可直接讓js module存取
java code
1
2
3
4
5
6
7
8
9
10
11
12
13
14
15
16
17
18
19
20
@Kroll.module(name="Test", id="com.example.test")
public class TestModule extends KrollModule {

@Kroll.method
public String example() {

return "hello world";
}

@Kroll.getProperty
public String getExampleProp() {

return "hello world";
}

@Kroll.setProperty
public void setExampleProp(String value) {

Log.d(LCAT, "set example property: " + value)
}

//....
}
js code
1
2
3
Ti.API.info( test.example() );
Ti.API.info("module exampleProp is => " + test.exampleProp);
test.exampleProp = "This is a test value";
若透過KrollProxy宣告的Kroll.method這類annotation,會先建立一個instance,在讓js使用
java code
1
2
3
4
5
6
7
8
9
10
11
12
13
14
15
16
17
18
19
20
21
22
23
24
25
26
27
28
29
30
31
32
33
34
@Kroll.proxy(creatableInModule=TestModule.class)
public class ExampleProxy extends TiViewProxy {

// ....

@Override
public TiUIView createView(Activity activity)
{

TiUIView view = new ExampleView(this);
view.getLayoutParams().autoFillsHeight = true;
view.getLayoutParams().autoFillsWidth = true;
return view;
}

// Methods
@Kroll.method
public void printMessage(String message)
{

Log.d(LCAT, "printing message: " + message);
}

@Kroll.getProperty @Kroll.method
public String getMessage()
{

return "Hello World from my module";
}

@Kroll.setProperty @Kroll.method
public void setMessage(String message)
{

Log.d(LCAT, "Tried setting module message to: " + message);
}

}
js code
1
2
3
4
5
6
7
8
9
10
11
12
13
14
15
if (Ti.Platform.name == "android") {
var proxy = test.createExample({
message: "Creating an example Proxy",
backgroundColor: "red",
width: 100,
height: 100,
top: 100,
left: 150
});

proxy.printMessage("Hello world!");
proxy.message = "Hi world!. It's me again.";
proxy.printMessage("Hello world!");
win.add(proxy);
}
若是想傳入function可透過KrollFunction
java code
1
2
3
4
5
6
@Kroll.method 
public void testCallback(KrollFunction cb) {

KrollDict dict = new KrollDict();
dict.put("test", 123);
cb.callAsync( getKrollObject(), dict );
}
js code
1
2
3
4
5
6
7
8
9
test.testCallback(function( evt ){
//1
Ti.API.info(arguments.length);
Ti.API.info(evt);
//{"test":123}
Ti.API.info(JSON.stringify( evt ));
//123
Ti.API.info(evt.test);
});

以上的程式碼皆為片段。

Connect Arduino Uno via Android Bluetooth

[Arduino端]

需要東西:

  • Arduino Uno
  • hc06 (藍芽模組,可自己挑一種自己需要)

Arduino只需要與藍芽模組對接即可:

  • VCC -> 5v
  • GND -> GND
  • TXD -> 8 (依照code setting)
  • RXC -> 9 (依照code setting)
載入需要函式庫
1
#include <SoftwareSerial.h>
定義連接藍牙模組的序列埠
1
SoftwareSerial BT(8, 9); // 接收腳, 傳送腳
配置監控視窗和藍芽模組鮑率
1
2
3
4
5
6
7
8
9
10
11
char val;  // 儲存接收資料的變數

void setup() {
Serial.begin(9600); // 與電腦序列埠連線
Serial.println("BT is ready!");

// 設定藍牙模組的連線速率
// 如果是HC-05,請改成38400
// HC-06 預設是9600
BT.begin(9600);
}
將監控視窗輸入的資料藍芽模組,並且列印至監控視窗
1
2
3
4
5
6
7
8
9
10
11
12
13
14
15
void loop() {
// 若收到「序列埠監控視窗」的資料,則送到藍牙模組
if (Serial.available()) {
val = Serial.read();
BT.print(val);
}

// 若收到藍牙模組的資料,則送到「序列埠監控視窗」
if (BT.available()) {
val = BT.read();
// 此行為了測試android發送資料,回傳相同資訊回去
BT.write(val);
Serial.print(val);
}
}

HC-06的命令設定

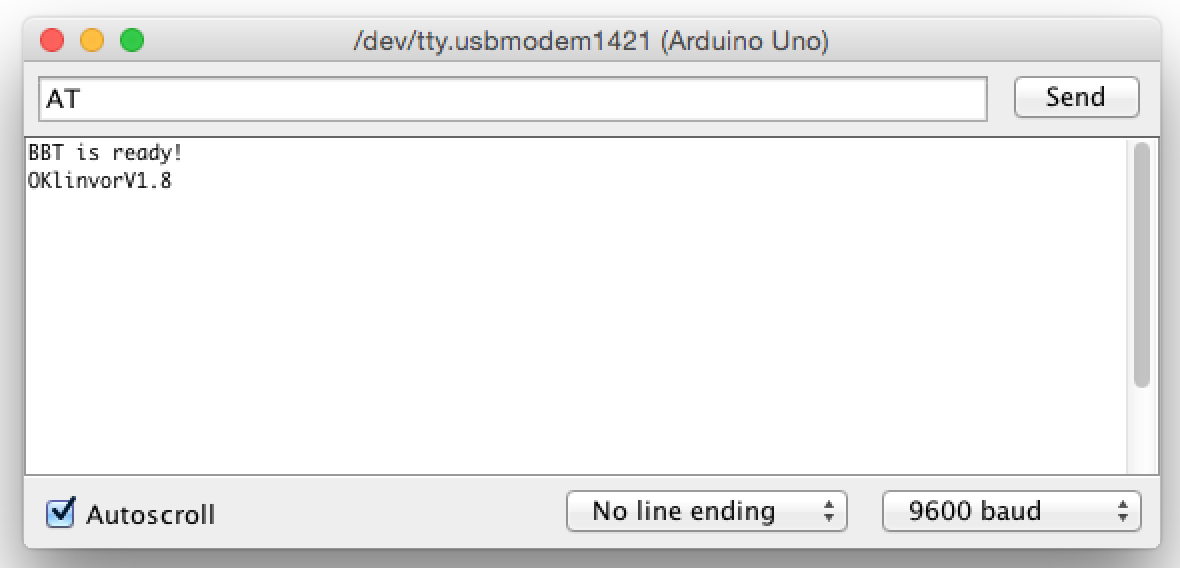
監控視窗向藍芽模組下指令

  • AT : 測試,回應「OK」
  • AT+VERSION: 回應韌體版本。
  • AT+NAME: 設定名稱,中間不得有空白。(ex:AT+NAME123, 名稱設為123)
  • AT+PIN: 設定連線密碼。(ex:AT+PIN1234, 密把設為1234)
  • AT+BAUD: 設定鮑率。(ex:AT+BAUD4, 設為9600bps)
鮑率數值如下:
1
2
3
4
5
6
7
8
1 set to 1200bps
2 set to 2400bps
3 set to 4800bps
4 set to 9600bps (Default)
5 set to 19200bps
6 set to 38400bps
7 set to 57600bps
8 set to 115200bps

[Android端]

android部分只需要先開藍芽匹配好arduino端的藍芽,接著就可開啟自己寫的code,去發送資訊。

取得藍芽裝置, 如果無法找到藍芽裝置,將會回傳空值
1
BluetoothAdapter myBluetoothAdapter = BluetoothAdapter.getDefaultAdapter();
取得arduino的device
1
2
// arduino的mac address
BluetoothDevice device = mBluetoothAdapter.getRemoteDevice(address);
連接arduino端的藍芽
1
2
3
// MY_UUID 可自訂一組
BluetoothSocketBluetoothSocket btSocket = device.createRfcommSocketToServiceRecord(MY_UUID);
btSocket.connect();
寫入訊息到arduino端
1
2
3
4
String message = "Hello world";
byte[] msgBuffer = message.getBytes();
outStream = btSocket.getOutputStream();
outStream.write(msgBuffer);
接收來至於arduino端的訊息
1
2
3
4
5
6
7
inStream = btSocket.getInputStream();
int bytesAvailable = inStream.available();
if(bytesAvailable > 0)
{
byte[] packetBytes = new byte[bytesAvailable];
inStream.read(packetBytes);
}
在Activity class中找尋device
1
2
3
4
5
6
7
8
9
10
11
12
13
14
15
16
17
18
19
20
21
22
23
24
25
final BroadcastReceiver bReceiver = new BroadcastReceiver() {
public void onReceive(Context context, Intent intent) {
String action = intent.getAction();
// 探索到的device
if (BluetoothDevice.ACTION_FOUND.equals(action)) {
// 取得一個藍芽device
BluetoothDevice device = intent.getParcelableExtra(BluetoothDevice.EXTRA_DEVICE);
// 顯示device的名稱和mac address
Log.d(device.getName() + "\n" + device.getAddress());
}
}
};

public void find(View view) {
if (myBluetoothAdapter.isDiscovering()) {
// 取消藍芽探索
myBluetoothAdapter.cancelDiscovery();
}
else {
// 開始探索藍芽裝置
myBluetoothAdapter.startDiscovery();
// 向activity註冊一個接收者
registerReceiver(bReceiver, new IntentFilter(BluetoothDevice.ACTION_FOUND));
}
}

titanium build failed(android)

今天在其他電腦裝titanium遇到以下錯誤:

1
2
3
4
5
6
7
8
9
10
11
12
13
14
[TRACE] Writing out AndroidManifest.xml
[ERROR] Exception occured while building Android project:
[ERROR] Traceback (most recent call last):
[ERROR] File "/home/sparrow/.titanium/mobilesdk/linux/3.1.0.GA/android/builder.py", line 2480, in <module>
[ERROR] builder.build_and_run(False, avd_id)
[ERROR] File "/home/sparrow/.titanium/mobilesdk/linux/3.1.0.GA/android/builder.py", line 2264, in build_and_run
[ERROR] self.manifest_changed = self.generate_android_manifest(compiler)
[ERROR] File "/home/sparrow/.titanium/mobilesdk/linux/3.1.0.GA/android/builder.py", line 1404, in generate_android_manifest
[ERROR] '-I', self.android_jar], warning_regex=r'skipping')
[ERROR] File "/home/sparrow/.titanium/mobilesdk/linux/3.1.0.GA/android/run.py", line 38, in run
[ERROR] print "[DEBUG] %s" % subprocess.list2cmdline(args_to_log)
[ERROR] File "/usr/lib/python2.7/subprocess.py", line 587, in list2cmdline
[ERROR] needquote = (" " in arg) or ("\t" in arg) or not arg
[ERROR] TypeError: argument of type 'NoneType' is not iterable

查了~/.titanium/mobilesdk/linux/3.1.0.GA/android/run.py這隻程式,發現有些參數是空的。

然後在androidsdk.py找到這段,功能是取得android sdk的aapt路徑:

1
2
3
4
5
6
7
8
9
def get_aapt(self):  
# for aapt (and maybe eventually for others) we
# want to favor platform-tools over android-x/tools
# because of new resource qualifiers for honeycomb
sdk_platform_tools_dir = self.get_sdk_platform_tools_dir()
if not sdk_platform_tools_dir is None and os.path.exists(os.path.join(sdk_platform_tools_dir, 'aapt')):
return os.path.join(sdk_platform_tools_dir, 'aapt')

return self.get_platform_tool('aapt')

比對另一台電腦sdk的platform-tools(舊):

1
2
3
4
5
6
7
8
9
10
11
12
13
|-- platform-tools
| |-- aapt
| |-- adb
| |-- aidl
| |-- api
| |-- dexdump
| |-- dx
| |-- fastboot
| |-- lib
| |-- llvm-rs-cc
| |-- NOTICE.txt
| |-- renderscript
| `-- source.properties

新下載的sdk:

1
2
3
4
5
6
7
8
9
10
11
12
13
14
15
16
17
├── platform-tools
│ ├── adb
│ ├── api
│ ├── fastboot
│ ├── NOTICE.txt
│ └── source.properties
├── build-tools
│ └── 17.0.0
│ ├── aapt
│ ├── aidl
│ ├── dexdump
│ ├── dx
│ ├── lib
│ ├── llvm-rs-cc
│ ├── NOTICE.txt
│ ├── renderscript
│ └── source.properties

所以新版的sdk目錄結構有變動,在加上titanium執行檔案有預設路徑,解決方式有下列幾種:

  1. 修改androidsdk.py裡面的get_dx、get_dx_jar、get_aapt…回傳路徑
  2. 搬移檔案build-tools檔案到platform-tools
  3. 直接使用link

我使用直接採用link的方式:

1
2
3
4
5
6
cd ~/tool/android-sdk/platform-tools
ln -s ../build-tools/17.0.0/aapt
ln -s ../build-tools/17.0.0/dx
ln -s ../build-tools/17.0.0/dexdump
ln -s ../build-tools/17.0.0/llvm-rs-cc
ln -s ../build-tools/17.0.0/aidl

最後還要還要記得設定jarsigner、keytool:

1
2
3
4
sudo update-alternatives --install "/usr/bin/jarsigner" "jarsigner" "/usr/lib/jvm/java-6-sun/bin/jarsigner" 1
sudo update-alternatives --install "/usr/bin/keytool" "keytool" "/usr/lib/jvm/java-6-sun/bin/keytool" 1
sudo update-alternatives --config jarsigner
sudo update-alternatives --config keytool

android google map key

在android使用google map api時,必須需要有一個key,才能使用google map api。

首先在linux環境底下,執行以下command line:

keytool -list -keystore ~/.android/debug.keystore

輸入密碼可以直接按enter,接著你會得到一串md5。

接著你可以經由google得到一串key,把key加入到layout裡,或者直接建立MapView object也可輸入

<com.google.android.maps.MapView
    android:id="@+id/mapview"
    android:apiKey="your key"
    android:layout_width="fill_parent"
    android:layout_height="fill_parent"
    android:enabled="true"
    android:clickable="true"
/>
配置AndroidManifest.xml
<?xml version="1.0" encoding="utf-8"?>
<manifest xmlns:android="http://schemas.android.com/apk/res/android"
      package="com.test.test"
      android:versionCode="1"
      android:versionName="1.0">
    <application android:label="@string/app_name" android:icon="@drawable/icon">
        <uses-library android:name="com.google.android.maps" />
        <activity android:name="GMapView"
                  android:label="@string/app_name">
            <intent-filter>
                <action android:name="android.intent.action.MAIN" />
                <category android:name="android.intent.category.LAUNCHER" />
            </intent-filter>
        </activity>
    </application>
    <uses-permission android:name="android.permission.ACCESS_FINE_LOCATION"/>
    <uses-permission android:name="android.permission.INTERNET" />
</manifest> 

其中uses-library是必須的,uses-permission則是根據你使用的api功能決定。


如果要能到android market上,你必須另外申請一組key,而不是用android debug key。

你可以使用以下command line去建立一個keystore:

keytool -genkey -v -keystore test.keystore -alias test -keyalg RSA -keysize 2048 -validity 10000

同樣使用md5去取得key,執行以下command line:

keytool -list -keystore test.keystore

接著拿去google取得key配置方法如上。

最後一個步驟,就是將你的未驗證的apk,去做驗證,command line如下:

jarsigner -verbose -keystore my-release-key.keystore my_application.apk alias_name

以及優化指令:

zipalign -v 4 your_project_name-unaligned.apk your_project_name.apk

若是使用ant,只要在build.properties加入以下兩行:


key.store=my-release-key.keystore

key.alias=alias_name

再執行ant release,即可產生驗證後的apk

申請keystore及驗證頁面

取得map key的說明頁面

經由md5取得map key
Android Linux開發環境配置(non-ide)

在開始配置環境之前,你必須先安裝好java,接著下載android sdk和ant

接在配置.bashrc這個檔案(家目錄):
export PATH=${PATH}:<sdk>/tools:<sdk>/platform-tools


如果沒配置,將無法使用模擬器,ant可以直接使用或參照以上配置方法,配置好在terminal上打

source .bashrc

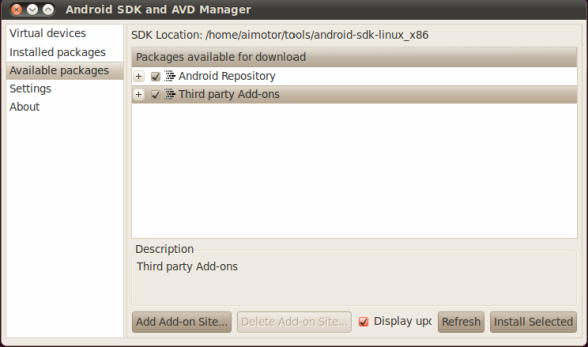
接著在terminal打上android將會出現以下視窗,將available packages裡面需要用到的都安裝上去,因為一開始

只提供2.3.3和3.0的模擬器。

安裝好之後接著配置專案,先查看能使用的模擬器版本及id:
android list targets


接著create project:
android create project \
--target <target_ID> \
--name <your_project_name> \
--path path/to/your/project \
--activity <your_activity_name> \
--package <your_package_namespace>
example:
android create project \
--target 1 \
--name MyAndroidApp \
--path ./MyAndroidAppProject \
--activity MyAndroidAppActivity \
--package com.example.myandroid


專案建立好後,只要在專案的根目錄下,對terminal執行以下指令,就可以產生apk:
ant debug
    or
ant release

查看目前連接的裝置:

adb devices 
 

64位元系統是無法使用adb,需要安裝:

sudo apt-get install ia32-libs
 
###### 接著最後一步就是開啟你的模擬器,在terminal下打指令:
adb -s emulator-5554 install _path/to/your/app_.apk

最後你就會在模擬器上面看到,剛剛安裝到模擬器上面的專案名稱了。